Winterizing Your Swimming Pool: A Beginner’s Guide
Category : Maintenance
Unless you live in a part of the world that enjoys year-round sunshine and balmy temperatures, you’ll eventually have to learn how to winterize your swimming pool.
What is winterizing, exactly? It’s the term for closing your pool during the coldest months of the year. By properly winterizing your swimming pool, you can help protect your pool from temperature- and weather-related damage while it’s not in use. Winterizing can also help keep your pool free of contaminants, dirt, and debris – which means you’ll be one step ahead when it comes time to open it up again for the spring and summer.
Ready to learn all about how to prepare your pool for winter? Let’s dive in!
Step 1: Decide which kind of winterizing is right for you
There are actually two types of winterizing: passive winterizing and active winterizing:
- Active winterizing is best in climates where the outside temperature typically remains above 5°C throughout the winter (in other words, places where your pool is unlikely to freeze). If you choose active winterizing, you’ll need to keep your pool filled and keep your filtration system running at idle every day for a minimum of two hours. You should also monitor your pool any time temperatures are around 0.
- Passive winterizing is a better choice if your swimming pool is likely to freeze during winter (if temperatures regularly drop below 5°C where you live, you should consider this option). If you choose passive winterizing, you’ll want to partially drain and cover your pool to prevent freeze-related damage.
Step 2: Gather your equipment
The first thing you’ll want to do is make sure that you have everything you need to winterize your swimming pool.
Swimming Pool Winterizing Checklist
Here’s a list of the supplies and equipment you’ll need to properly prepare to shut down your pool for the season:
- A test kit. Look for one that tests pH, alkalinity, and calcium hardness.
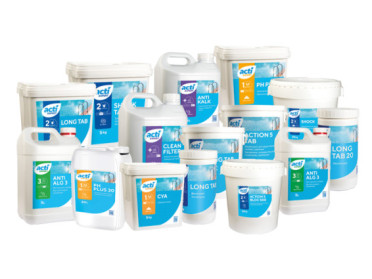
- Pool chemicals. Specifically, you’ll want chlorine and pool shock.
- Safety goggles and gloves. It’s a good idea to wear protective gear any time you’re working with chemicals.
- A pool brush, skimmer, and pool vacuum (and don’t forget the telescoping pole).
- A swimming pool cover. We recommend a strong and sturdy safety cover, which will keep your pool clean and reduce the risk of a child or pet falling into the water by accident.
Step 3: Balance Your Water
It’s a good idea to balance your water before you shut your pool down for the season. By ensuring that your pool water chemistry is where it needs to be, you can avoid labor-intensive maintenance headaches when it’s time to open your pool up again.
This is where a good test kit is essential. You’ll want to make sure that the kit you purchase tests for pH, water alkalinity, and calcium hardness. Some kits even include test strips, which are easy to use and perfect for newer swimming pool owners.
Step 4: Shock It!
Pool shock is essentially a mega-dose of chlorine that kills bacteria and contaminants. During the swimming season, pool owners use shock treatments to sanitize their pool water after heavy use or contamination. Shocking your pool before you shut it down for the season will help prevent the growth of algae and other harmful bacteria.
We recommend shocking your pool two or three days before you plan to shut things down. That will give your pool water a few days to return to its normal chlorine levels before you proceed with the winterization process.
Step 5: Clean and Sanitize Your Pool Accessories
Remove and thoroughly clean all swimming pool equipment, such as:
- Pool vacuums
- Ladders
- Handrails
- Skimmer baskets
- Wall fittings
- Pool toys
Once your equipment is clean, allow them to dry and store them in a clean, dry location where they’ll be protected from the elements.
Step 6: Greatly decrease the water level
Before you close down your pool for the season, you should lower the water level. Ideally, you want the water to be about 10 to 15 centimeters below the water return line. It should also be lower than the skimmer intake.
Step 7: Scrub your pool
Use a pool brush to give your swimming pool a good, thorough scrubbing. Make sure to brush the pool walls and the pool’s bottom, too.
Pro tip: A good telescoping pole will help you reach hard-to-access areas like the bottom of your pool.
Step 8: Drain and clean your filter
If you have a sand filter or a diatomaceous earth (DE) filter, you should backwash your filter before you disconnect and store it. If you have a cartridge filter, you should remove and clean your filter cartridge before shutting down your pool.
Step 9: Cover your pool
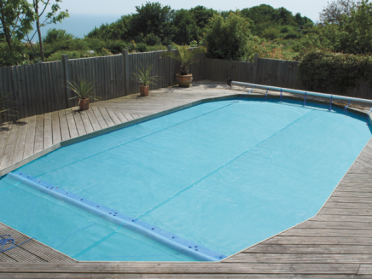
A pool cover is essential when shutting down your pool for the winter. A winter pool cover will ensure that your pool’s interior is shielded from the elements, and it will keep dirt, debris, and rain, ice, and snow out of your swimming pool water. It will also keep your pool shaded, which will help inhibit algae growth.
Rusty equipment? Try this easy fix.
If some of your swimming pool equipment (such as ladders or handrails) has developed a bit of rust after a season in the water, now’s a good time to address the issue. Here’s an easy home remedy:
First, make a paste made of equal parts baking soda and water. Cover the equipment with the baking soda mixture, paying special attention to rusty spots. Brush gently with a nylon brush, then rinse with clean water. Dry with a clean, soft cloth.
For extra protection, consider waxing and buffing your equipment. This can add an extra layer of protection while your equipment is in storage for the winter. It can also help prevent rust from forming again next year.
Safety covers are worth the investment.
Standard winter swimming pool covers are fine for keeping debris and contaminants out of your pool. If you’ve got kids or pets nearby, consider upgrading to an extra strong safety cover, which is strong and sturdy enough to keep unattended kids and small animals from falling into your pool by accident.


